Gantt Chart
One of the many ways of visualizing your Projects in Skills Workflow is in a Gantt Chart.
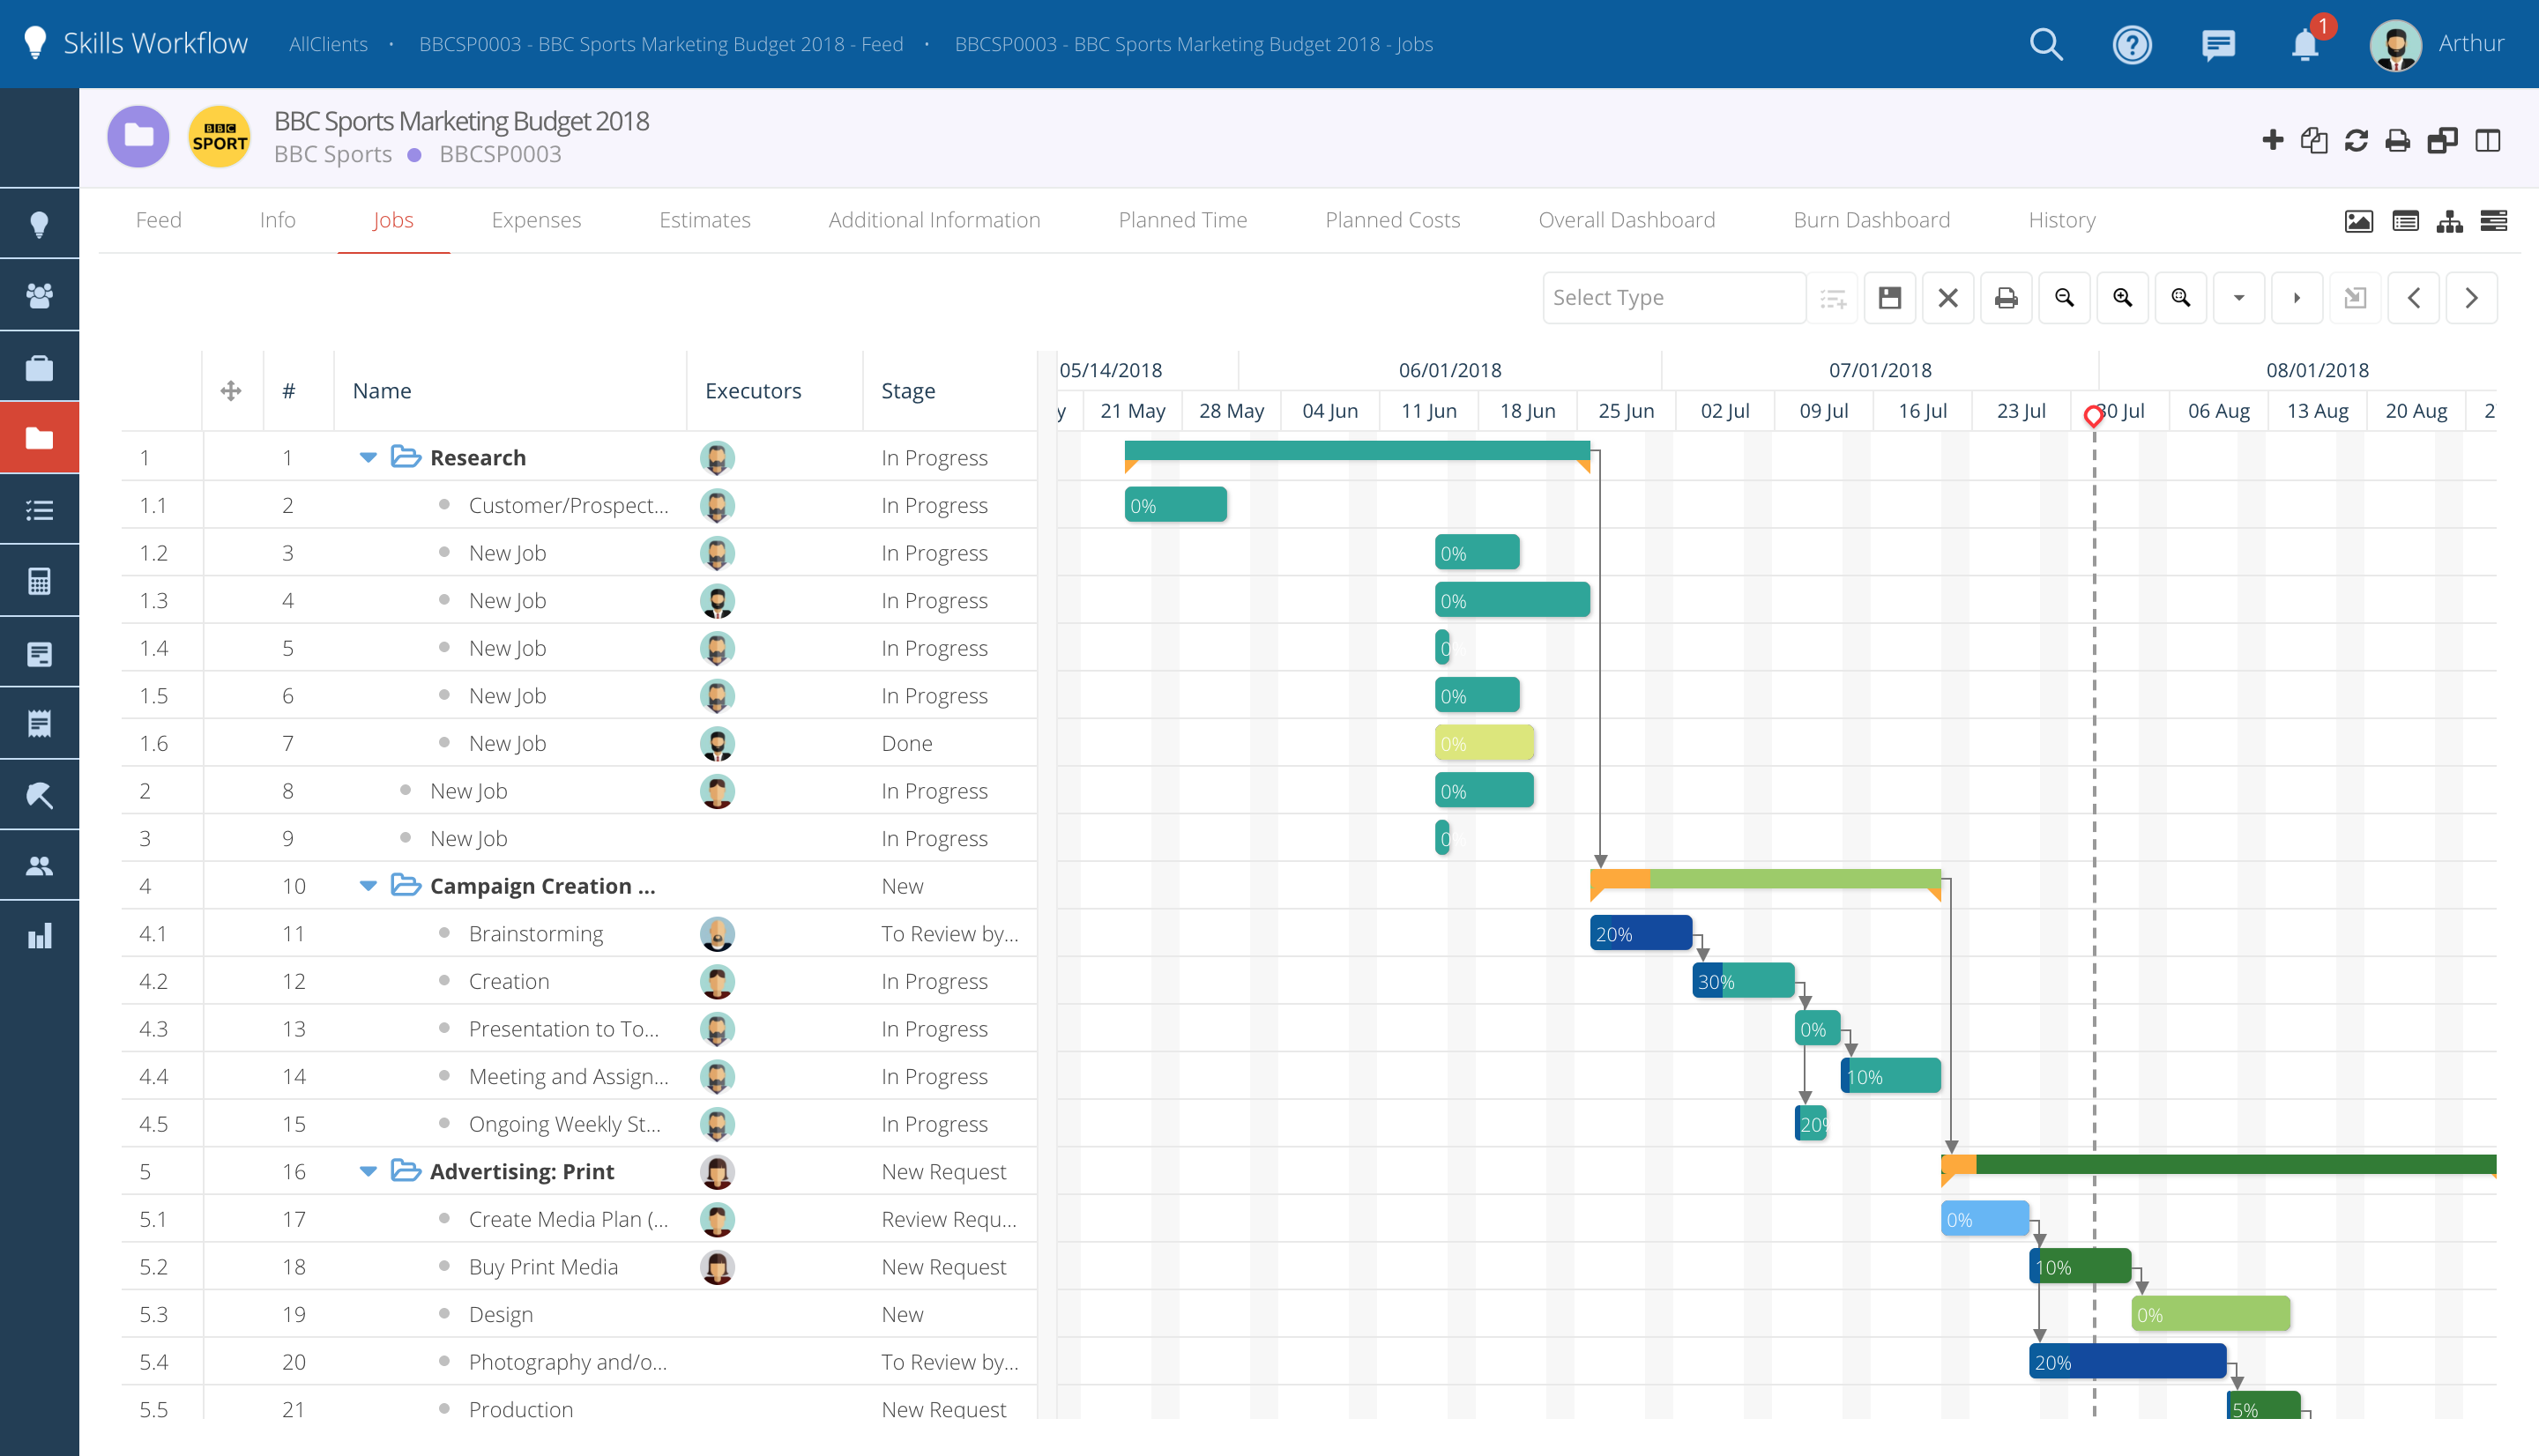
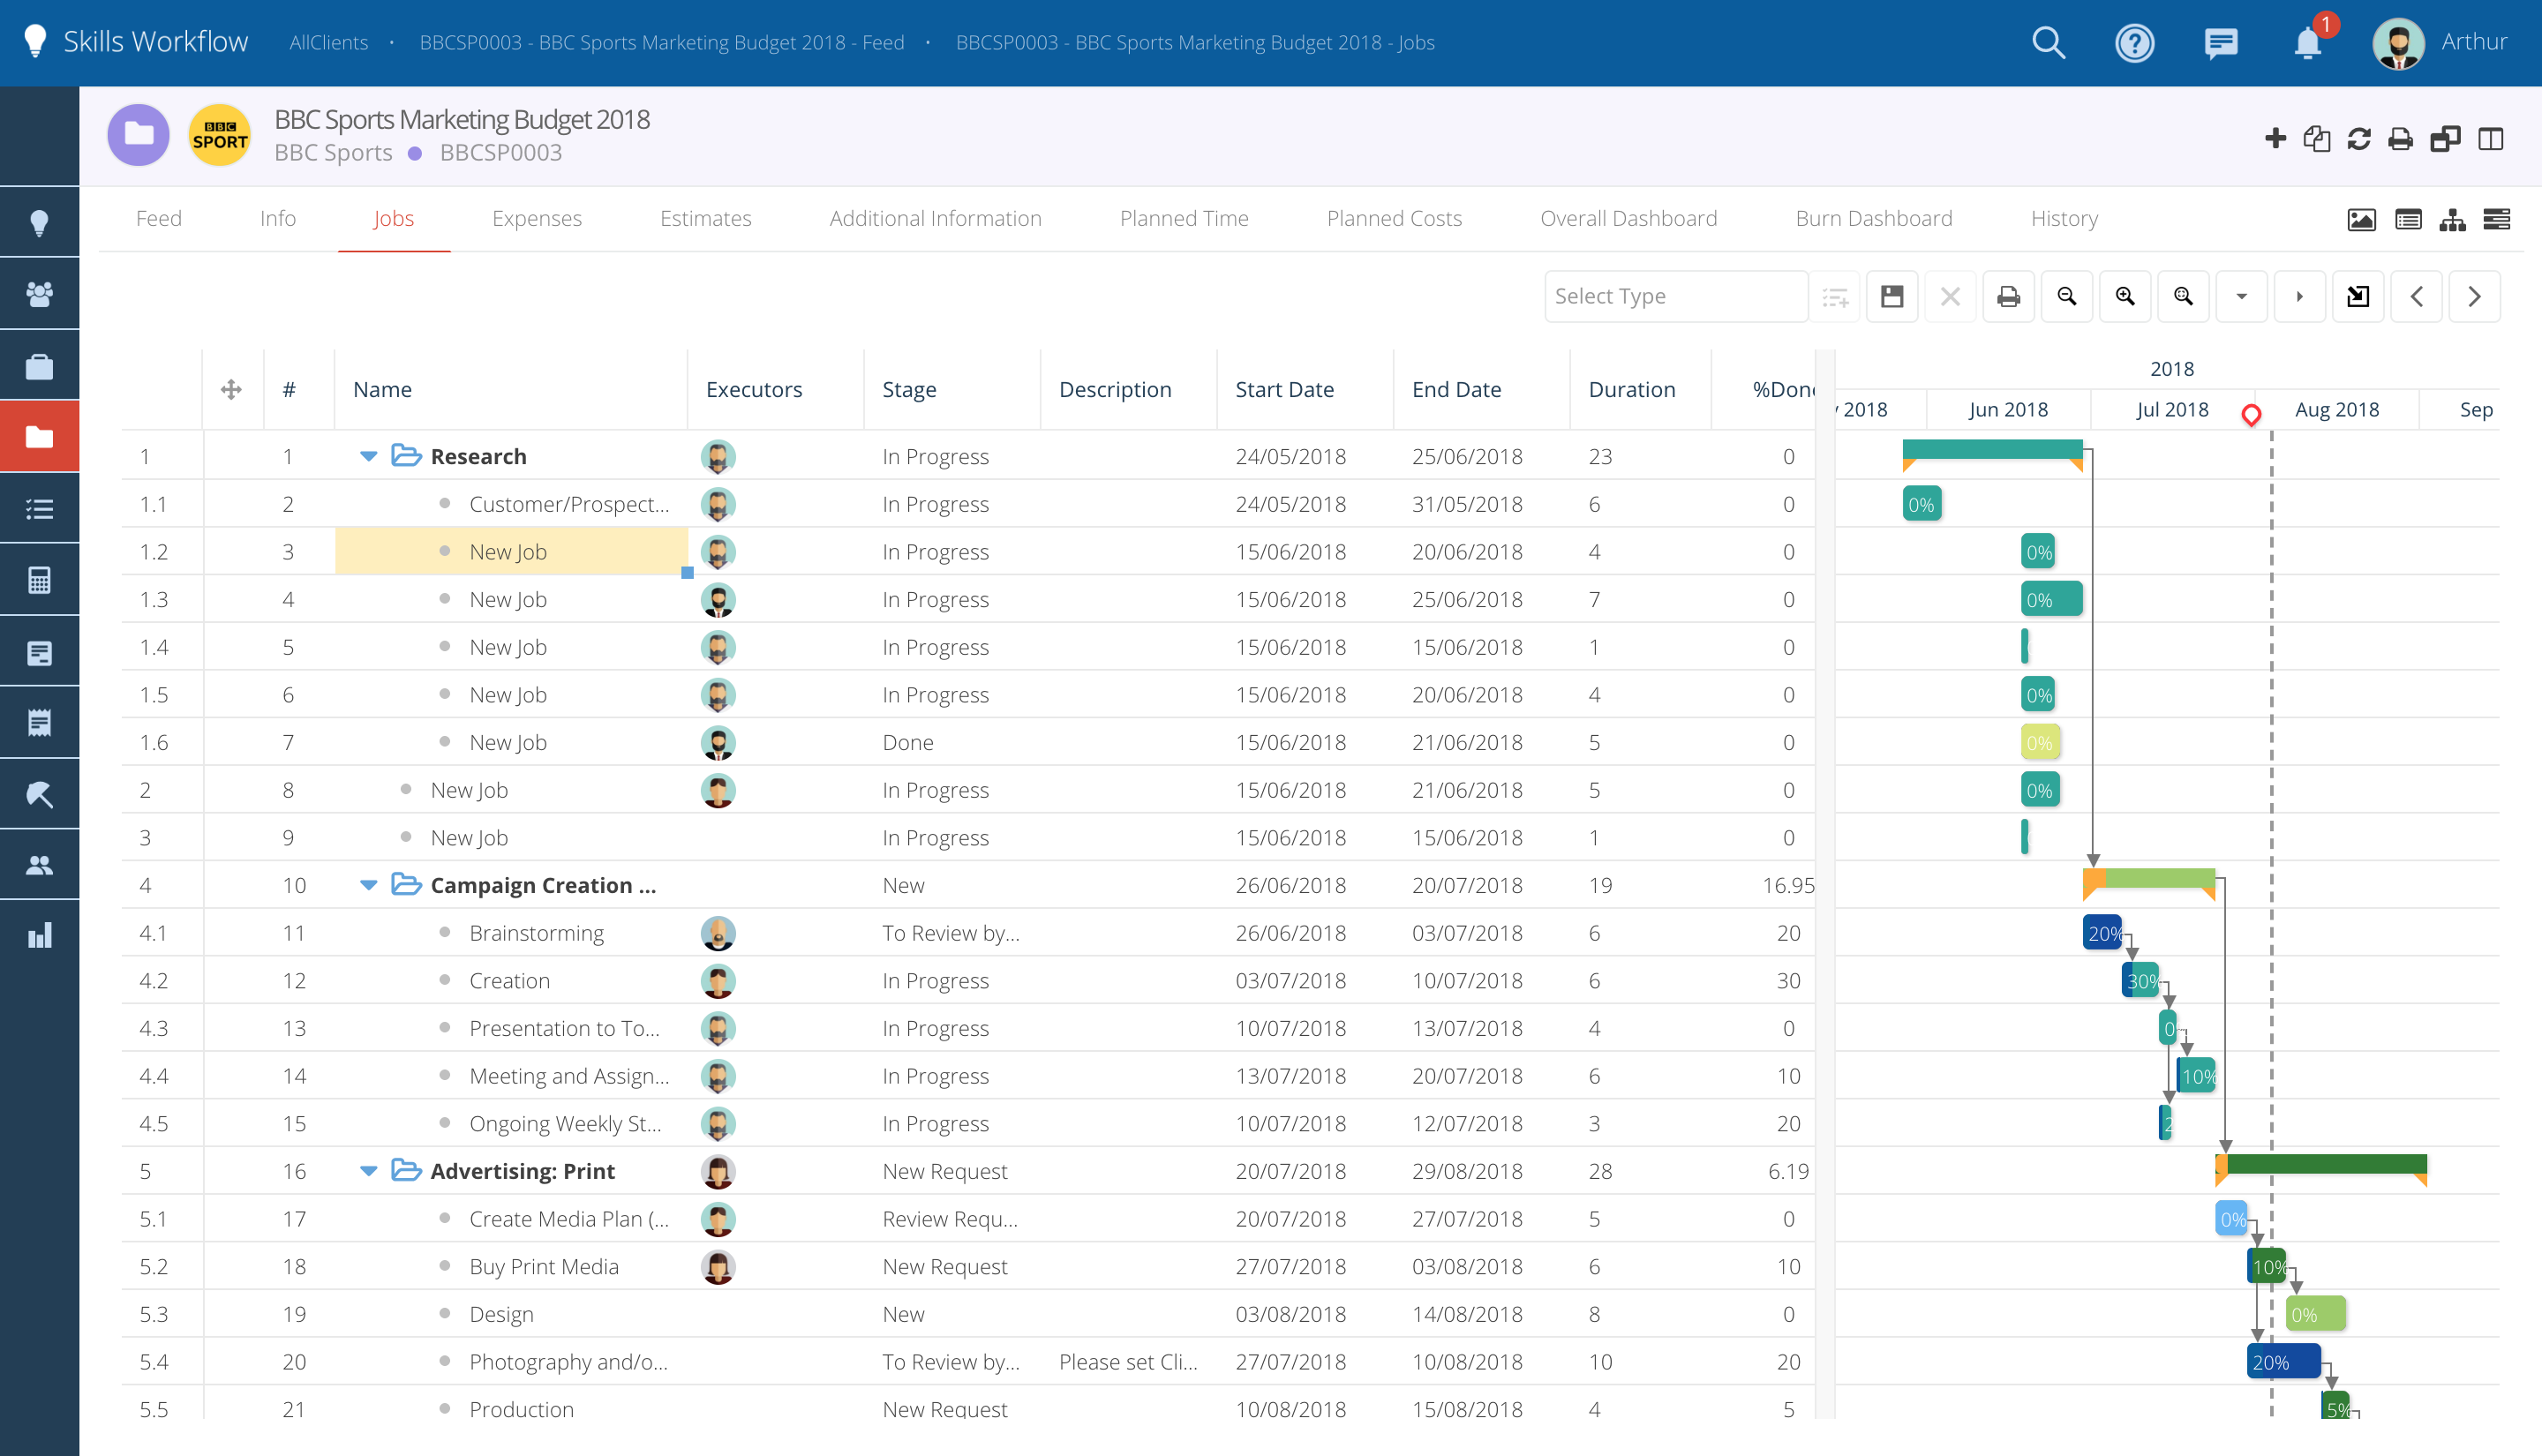
The Gantt view will give a more visual representation of all the jobs of a Project and how they are related to one another through time.
Create your parent and child Jobs
-
Start by creating Jobs inside your Project.
-
Under a parent Job you can also create many child jobs.
Switch to Gantt View.
-
Inside the Project, on the tab "Jobs" click on this symbol.

-
Check your Jobs and their hierarchy on the left.
-
Check start and end date of each Job and adjust if needed.The system calculates duration of each job in days based on the start and end dates defined.
-
You can adjust your jobs by doing changes on the respective columns on the left or by directly moving the horizontal bars.
-
Drag them through the calendar to change the dates or strech/shrink them to lenghten/shorten the duration of the jobs.
-
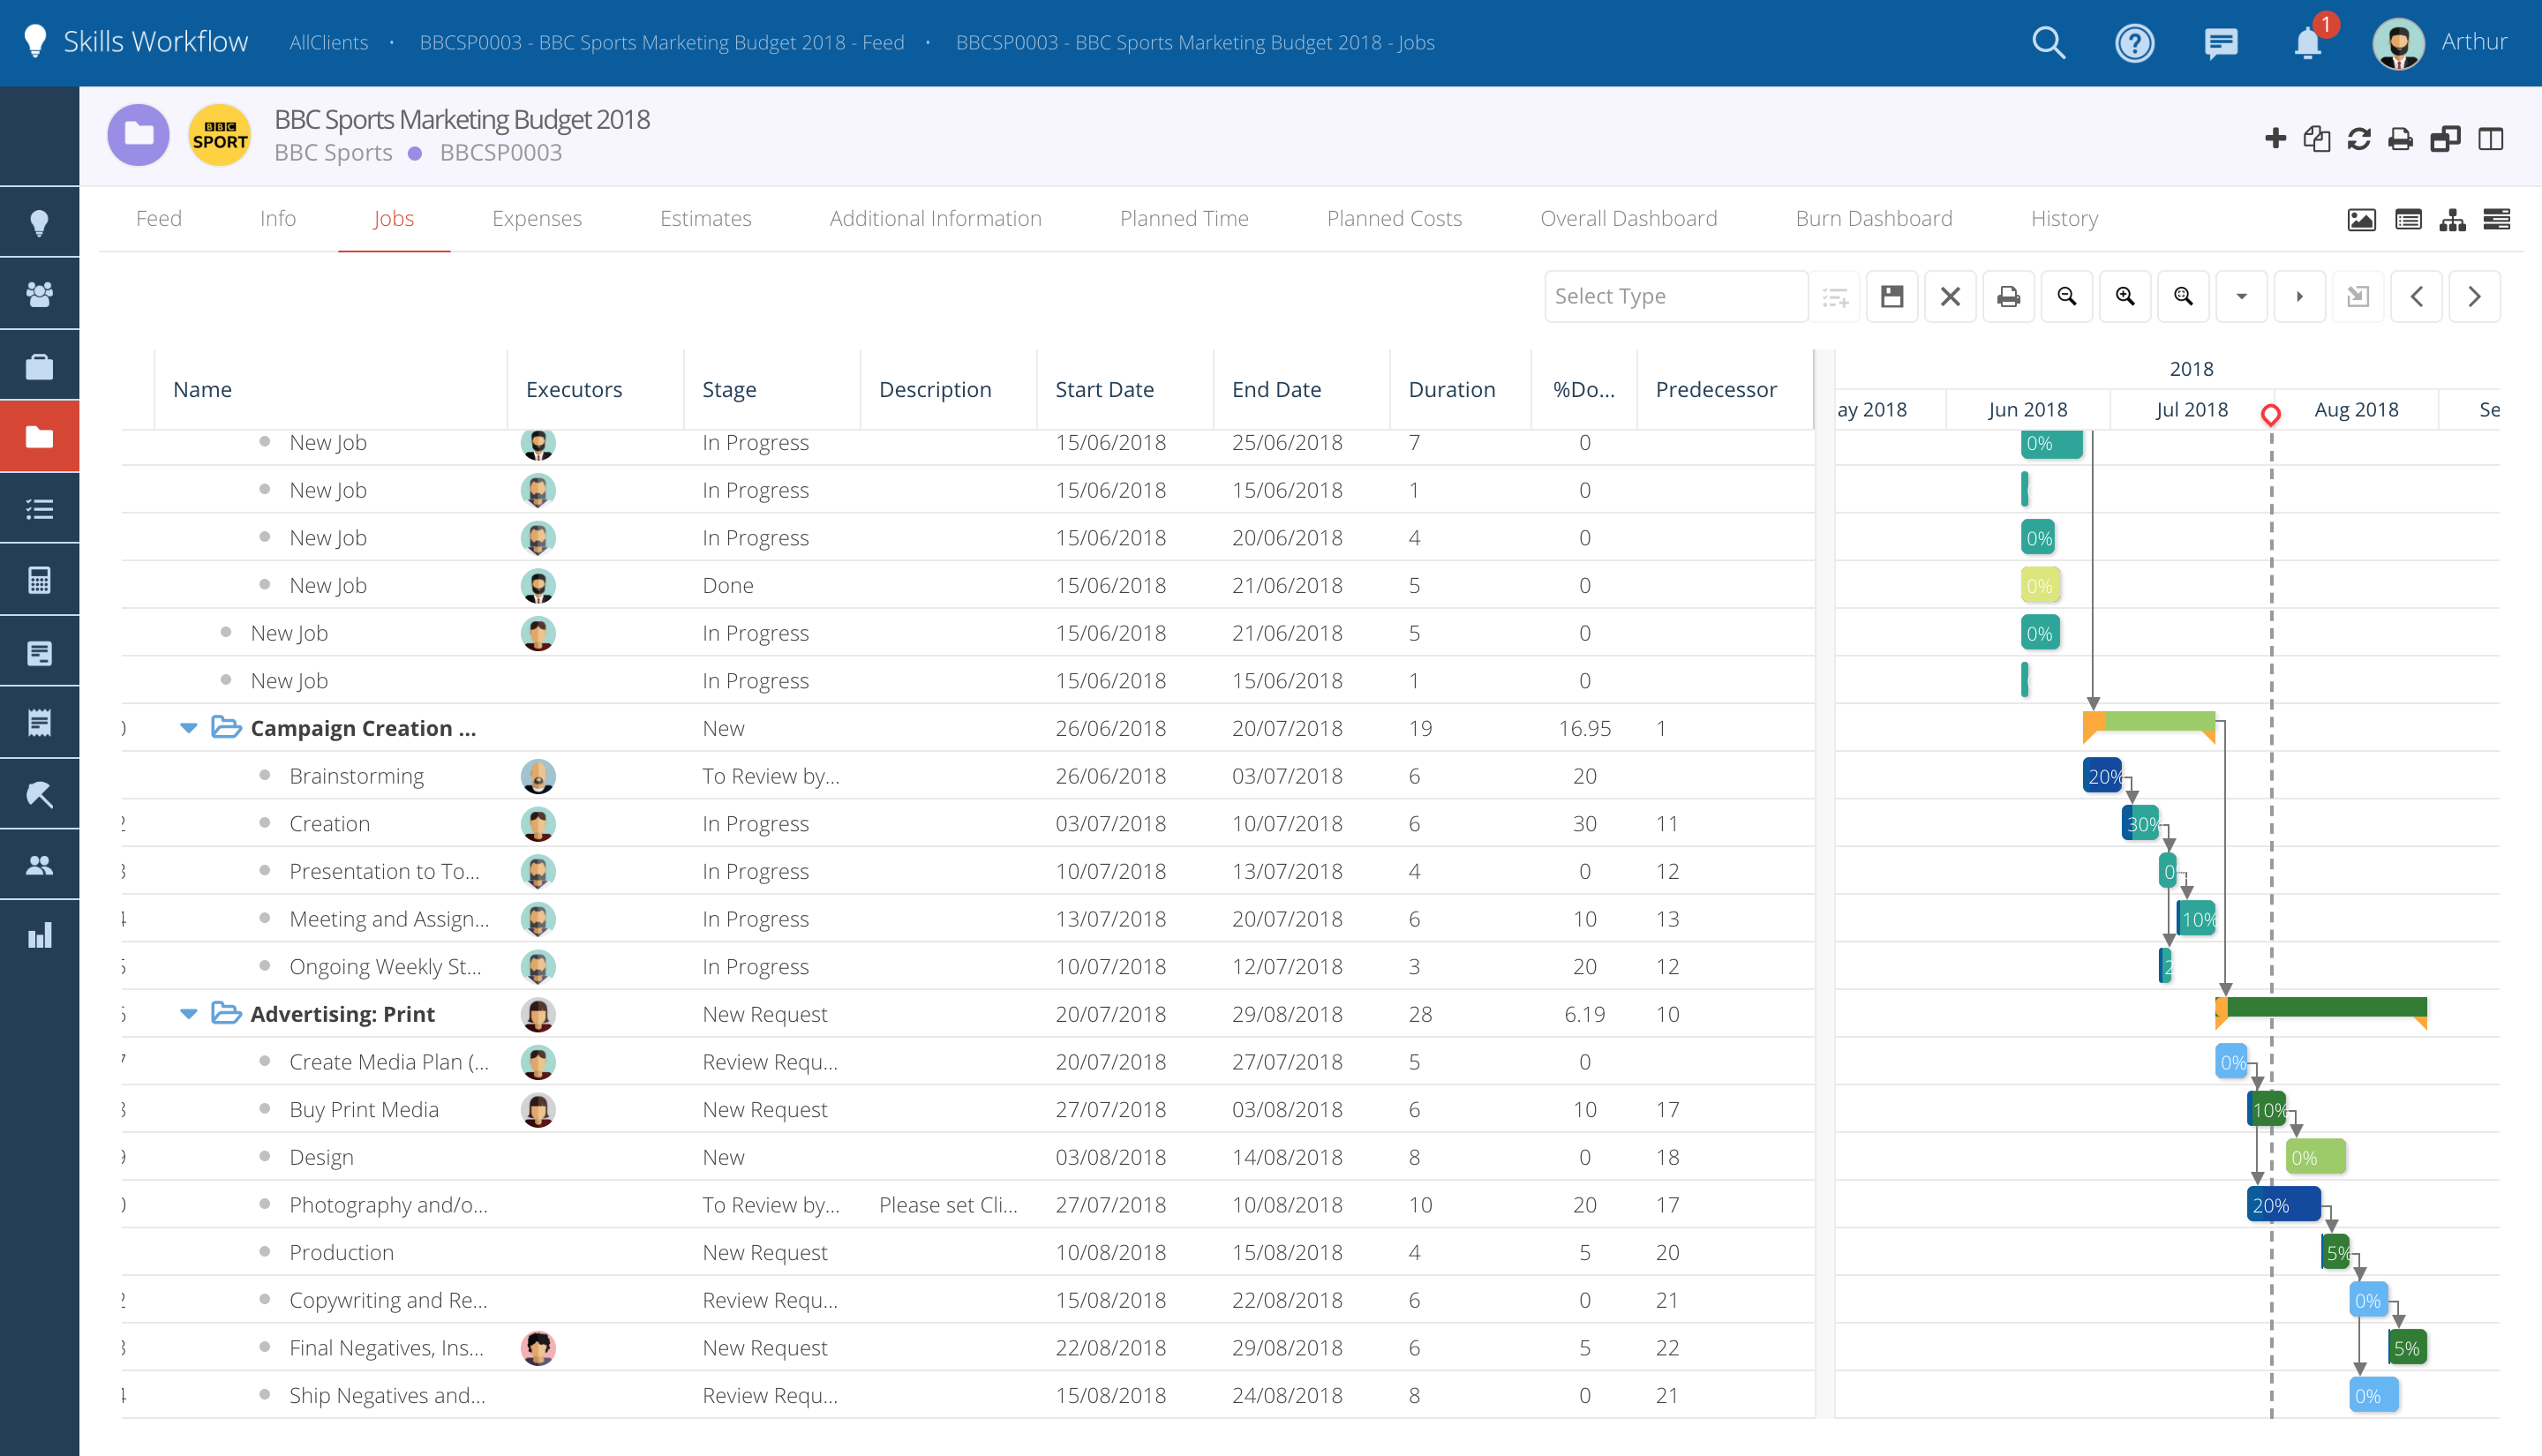
Configure the dependency between the jobs by filling in the predecessor column.
Check completeness of each job.
-
On the field "% Done" you can check how much has been done on a given job and whether it has already finished (100% done) or is still in progress (<100% done).
-
These percentages are pre-defined based on the Workflow Stage the job is in. E.g. You can define that when a job reaches the stage "Waiting Client Approval " it is 70% complete.
-
As jobs move along the workflow to different stages, these % in the Gantt automatically change, but you can still manually adjust them if needed.
-
The colour of each bar represents the stage that respective job is in.
The Gantt View includes several buttons at the top to help you adjust your chart view:
 - Every time you do a change you'll need to save the changes.
 - Zoom Out
 - Zoom In
 - Zoom to fit all of the information on the screen
 - Expand All to see the details of all Jobs
 - Collapse All to see only the Jobs (parents)
 - Add a new Job
 - Go to the selected Job
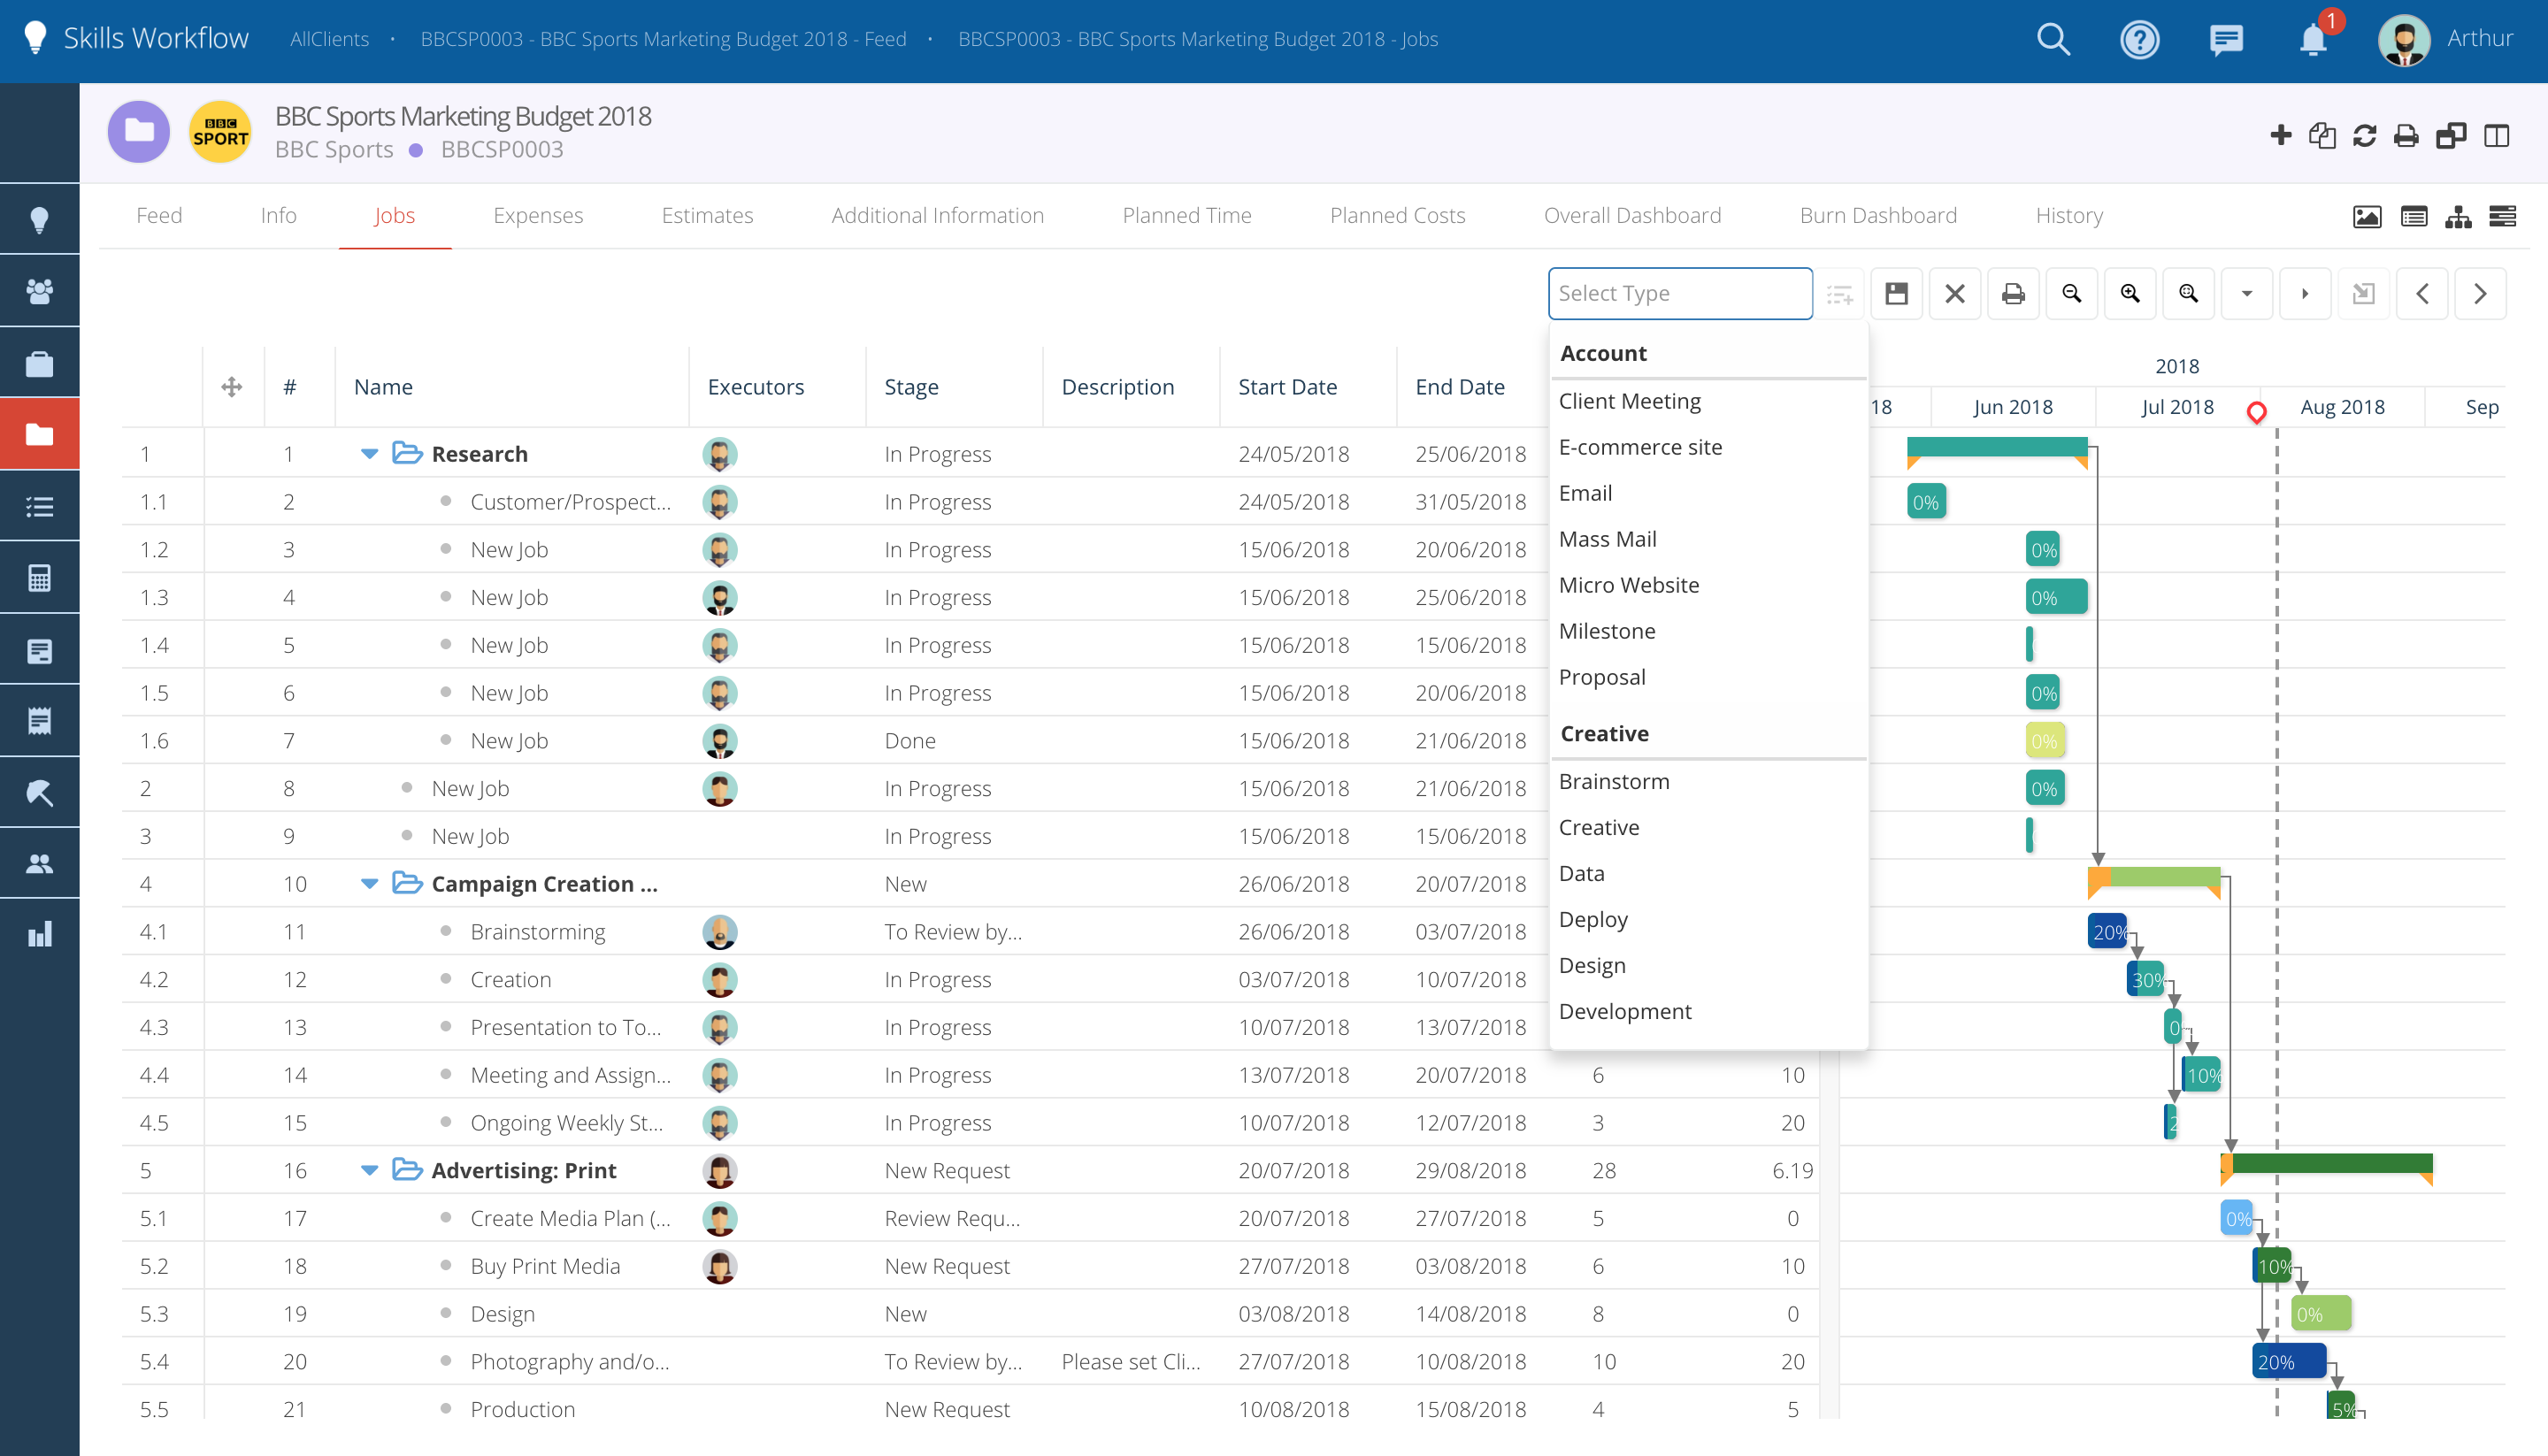
JobType Dropdown
-
You can easily add Jobs to the Gantt without having to use the regular Job creation pop-up.
-
To add a new Job to the gantt, you'll need to select a Department/Job Type from the dropdown list.
-
When the Job Type is already selected click on the "Add Job" option and the job will be automatically added to the Gantt.
-
The job will only be activated as soon as you click on the "Save" option.
-
It will move to the first stage defined on the Workflow.
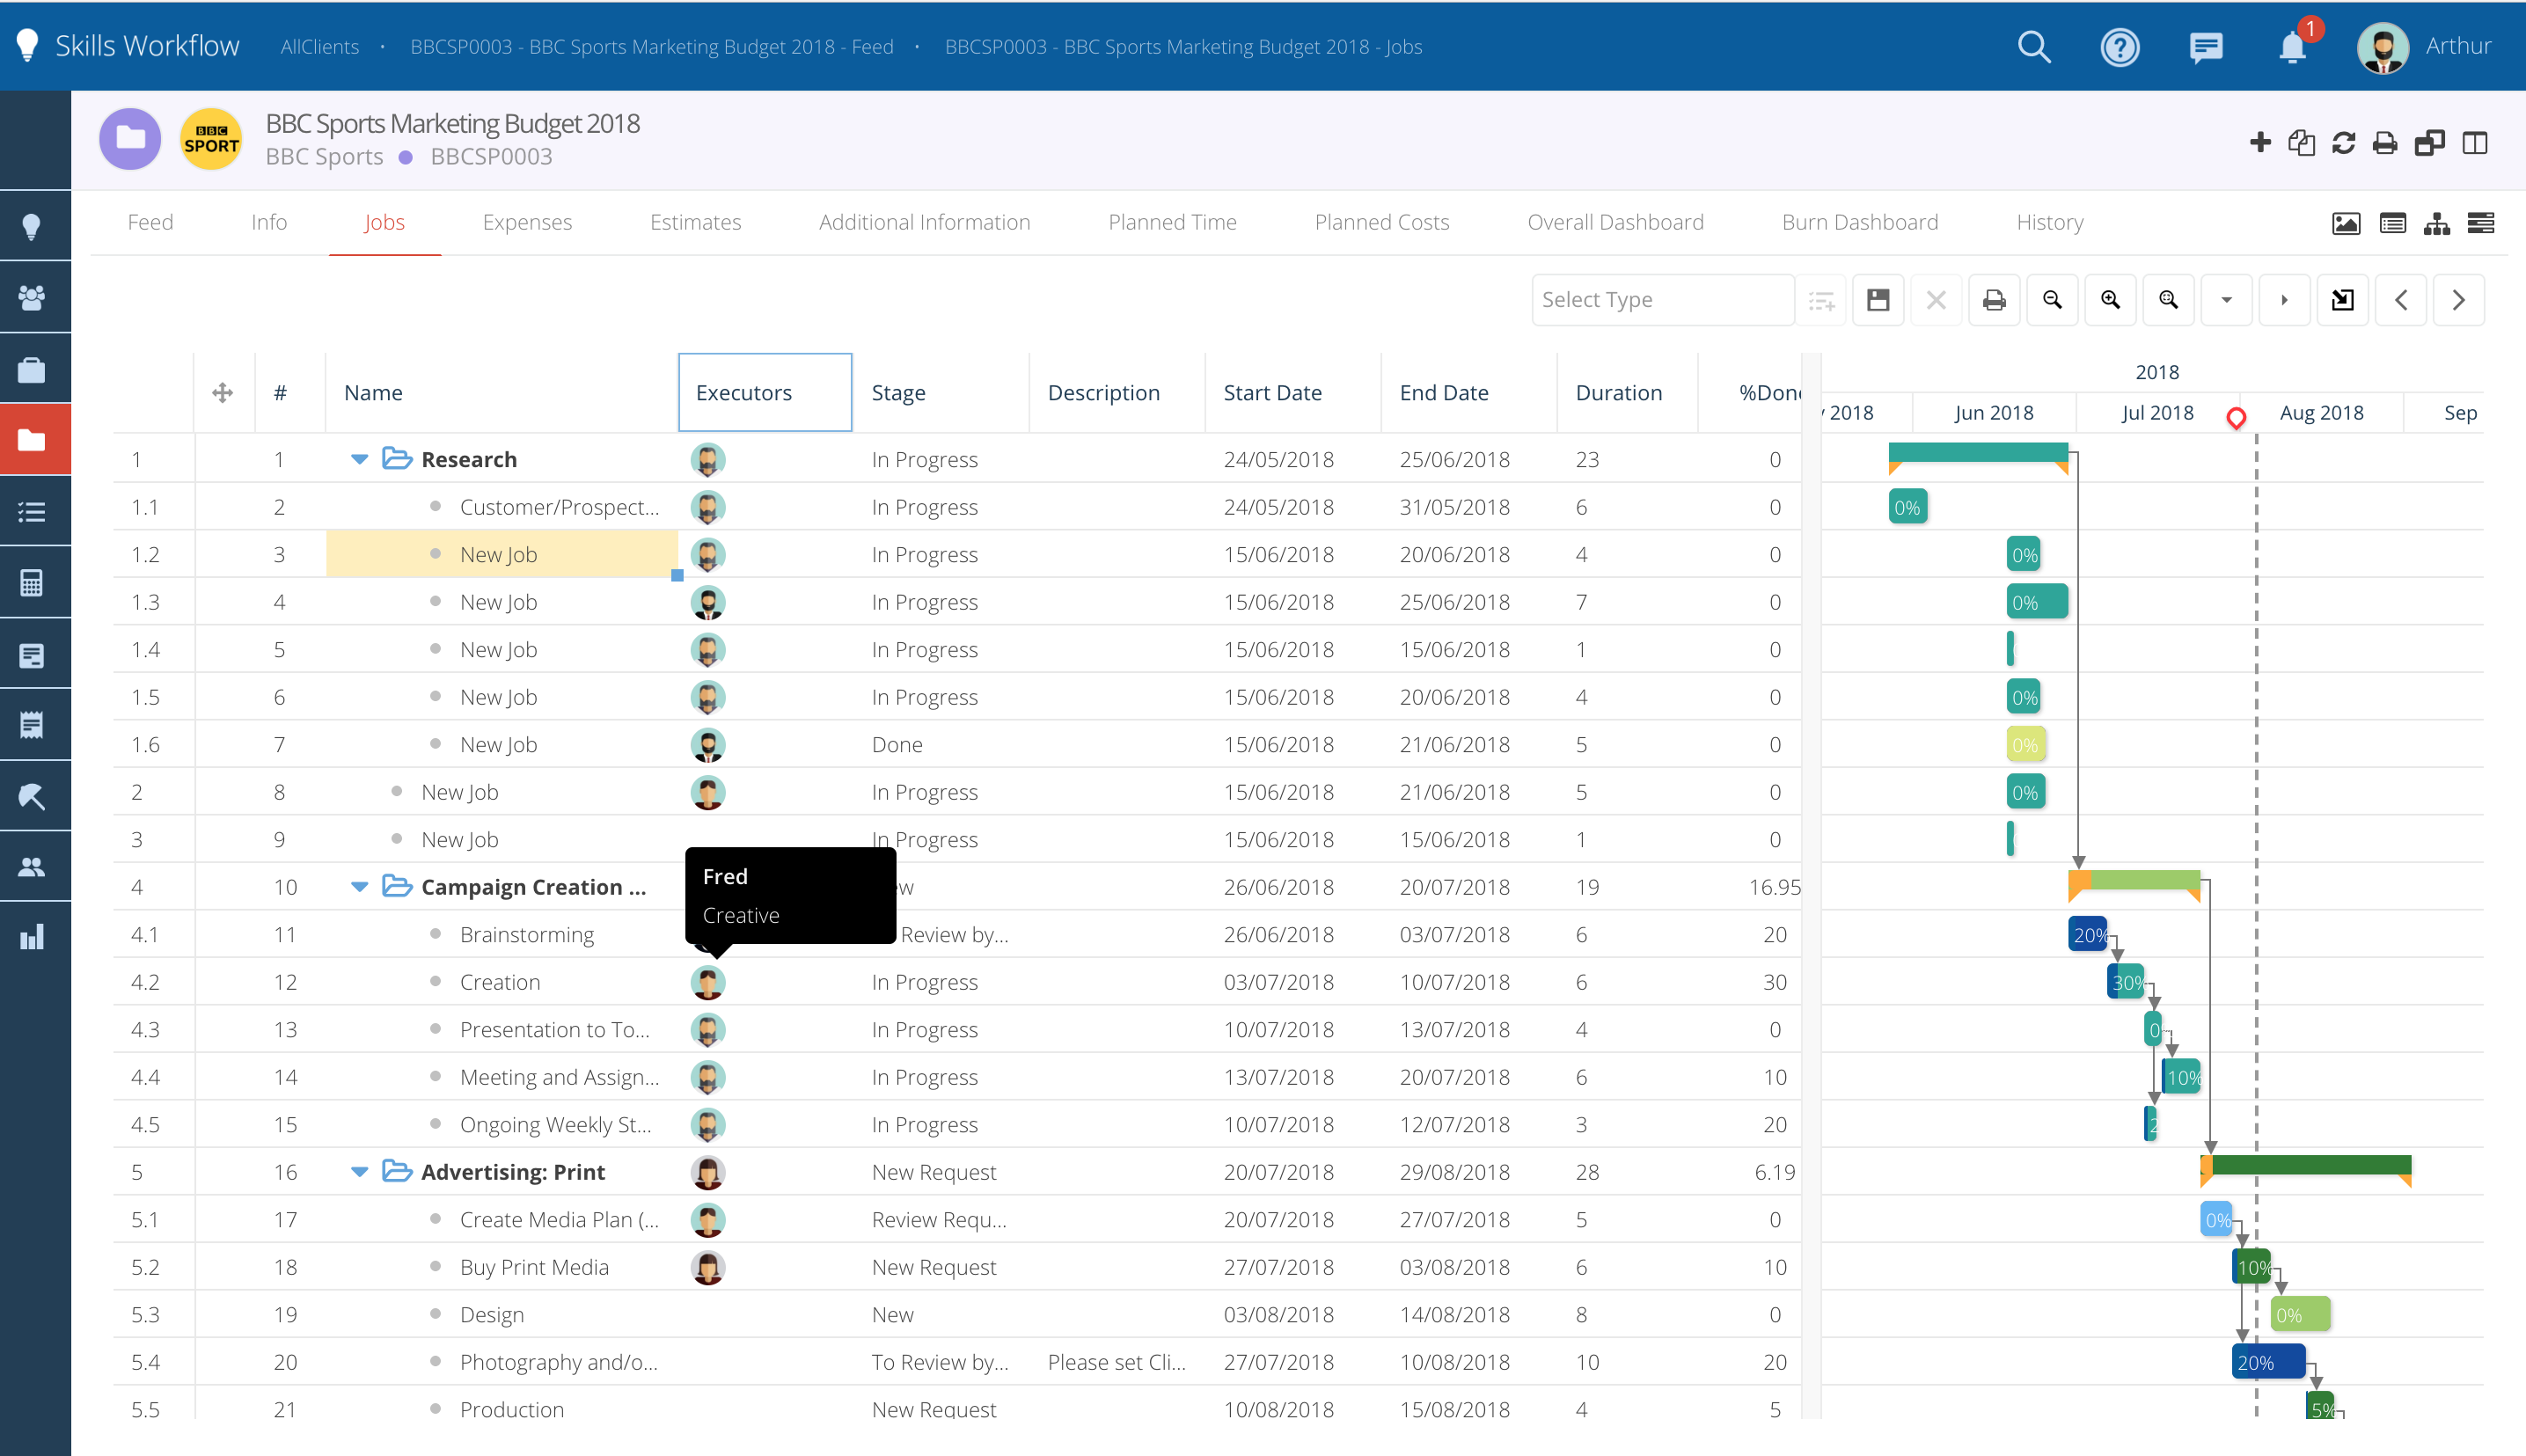
Executors Column
-
On the Executors Column you can easily check who's been assigned to the jobs by passing your mouse on top of the image.
-
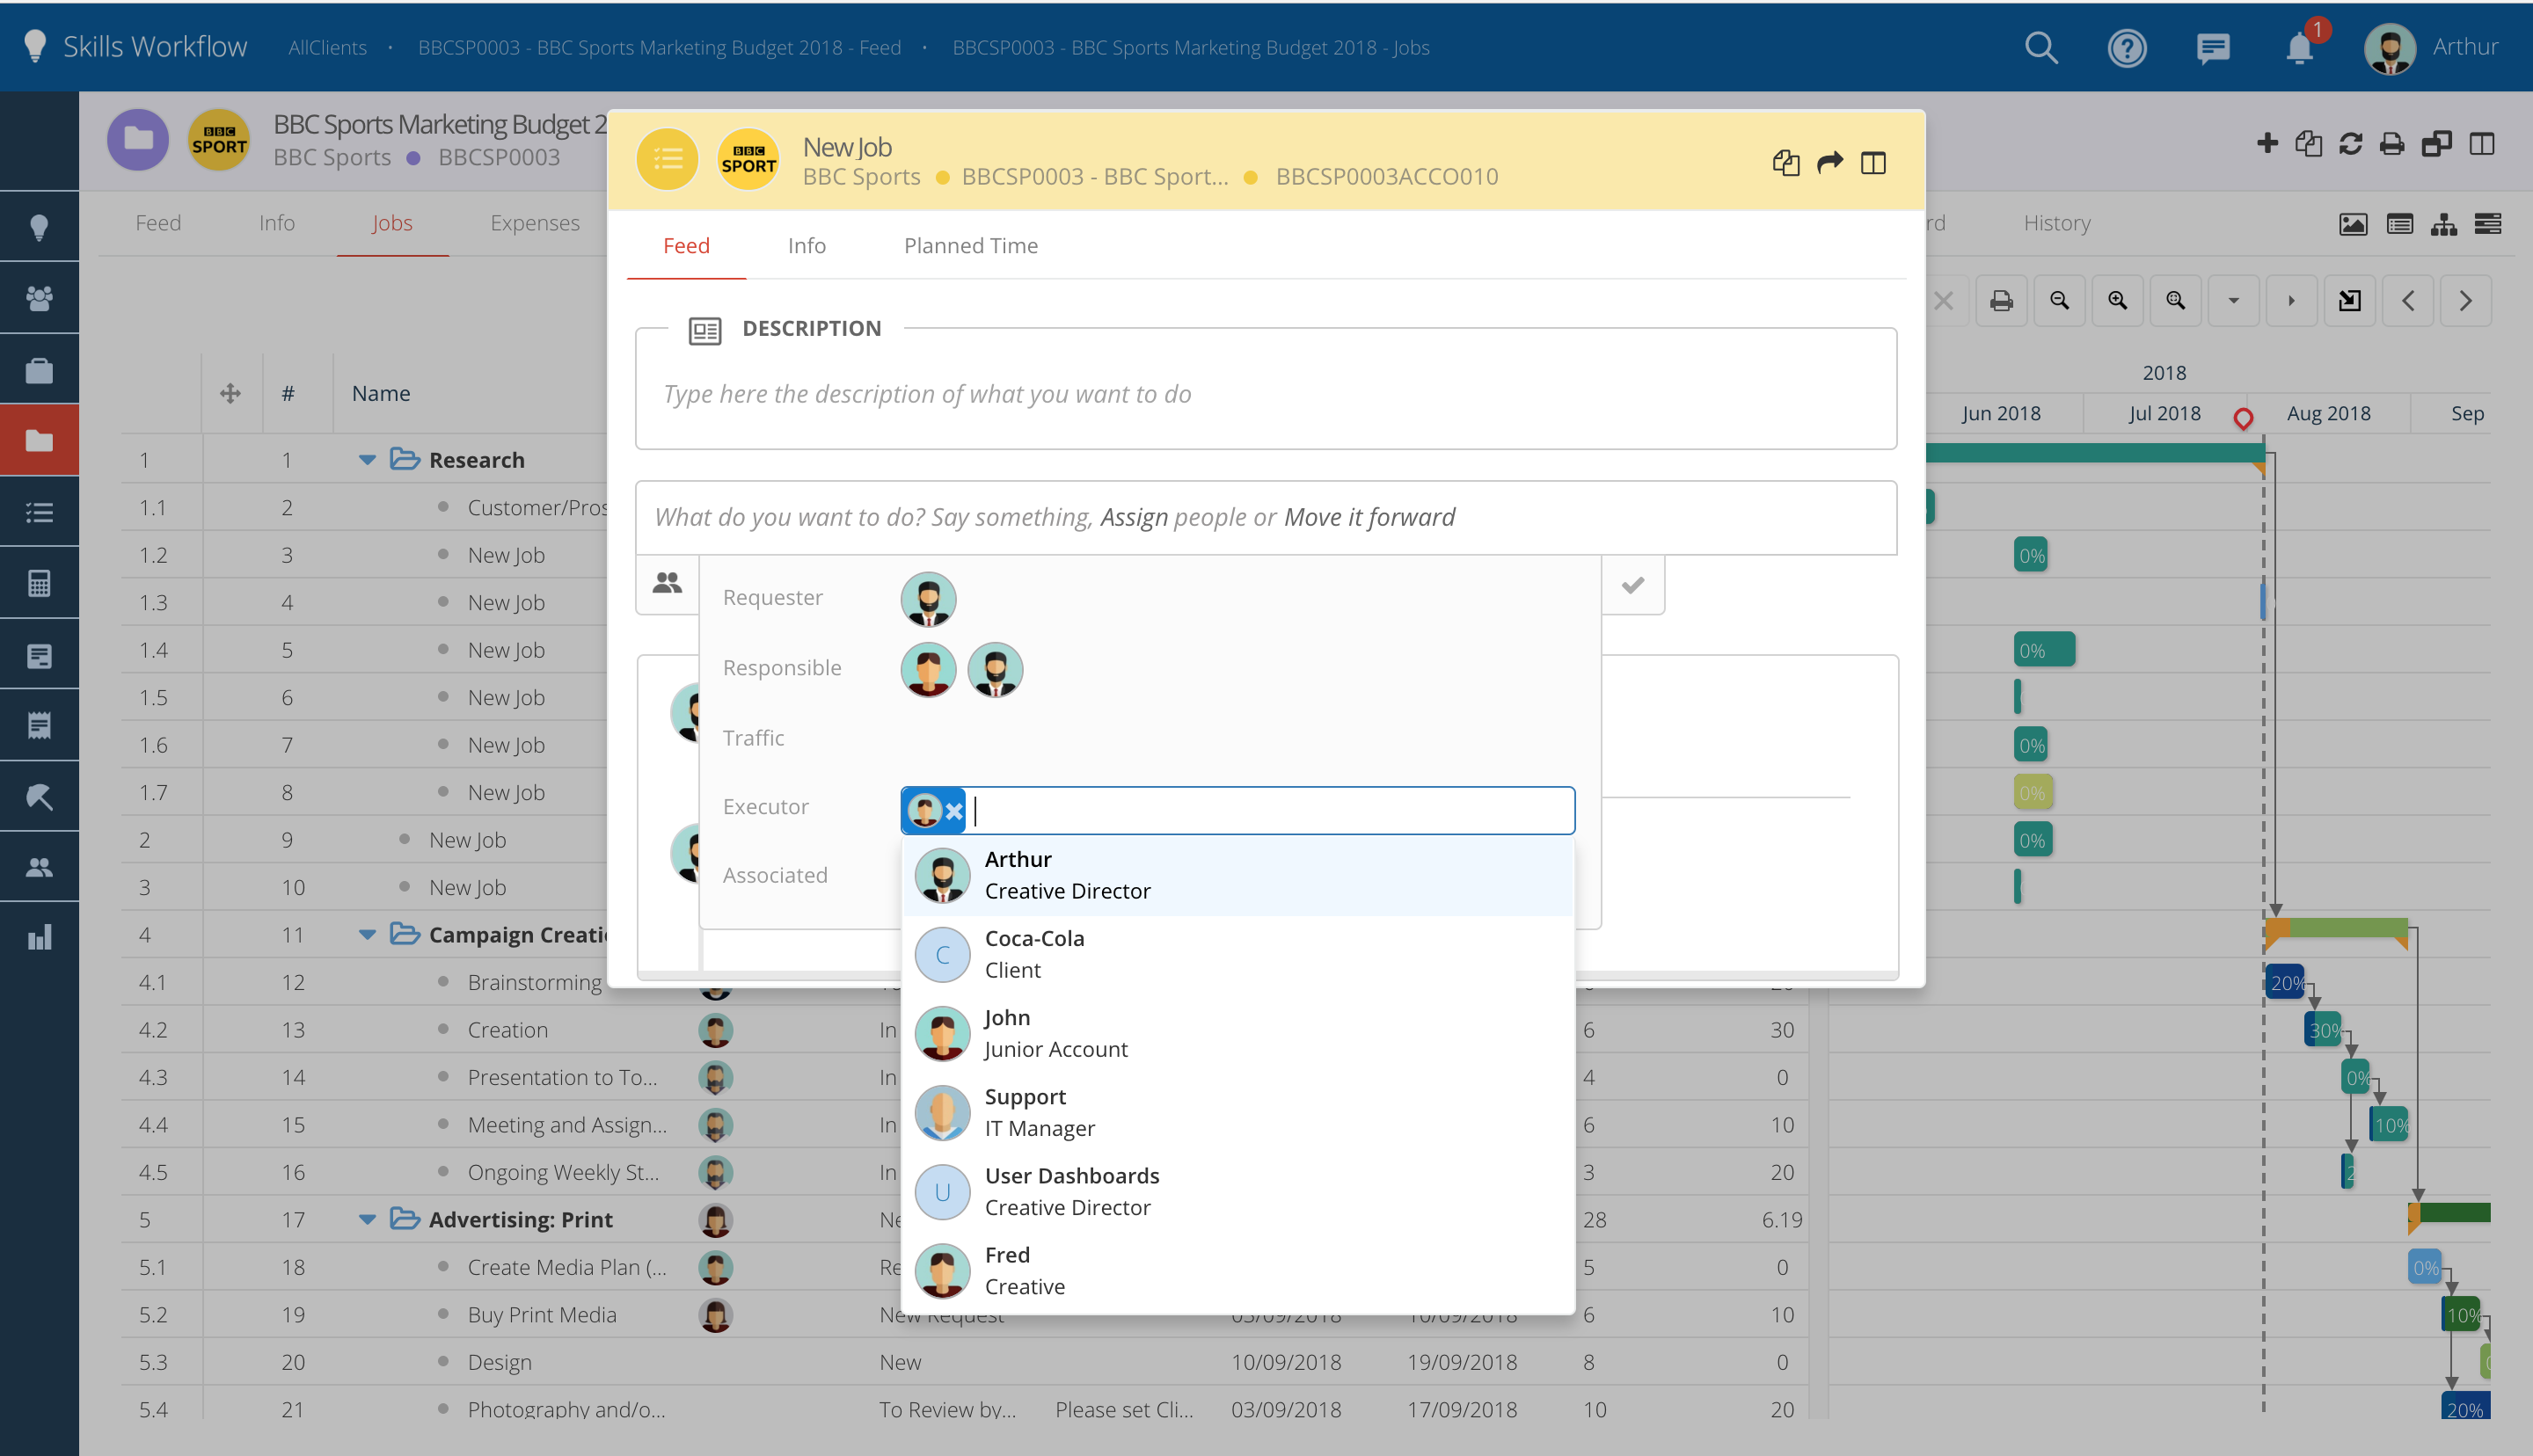
You can also easily assign users by clicking directly on the Executors column. The job will automatically open on the Assignments pop-up.
-
Search for a username or title and click on it to add as an executor. After this you'll need to submit the post.
Copy & Paste the Gantt
-
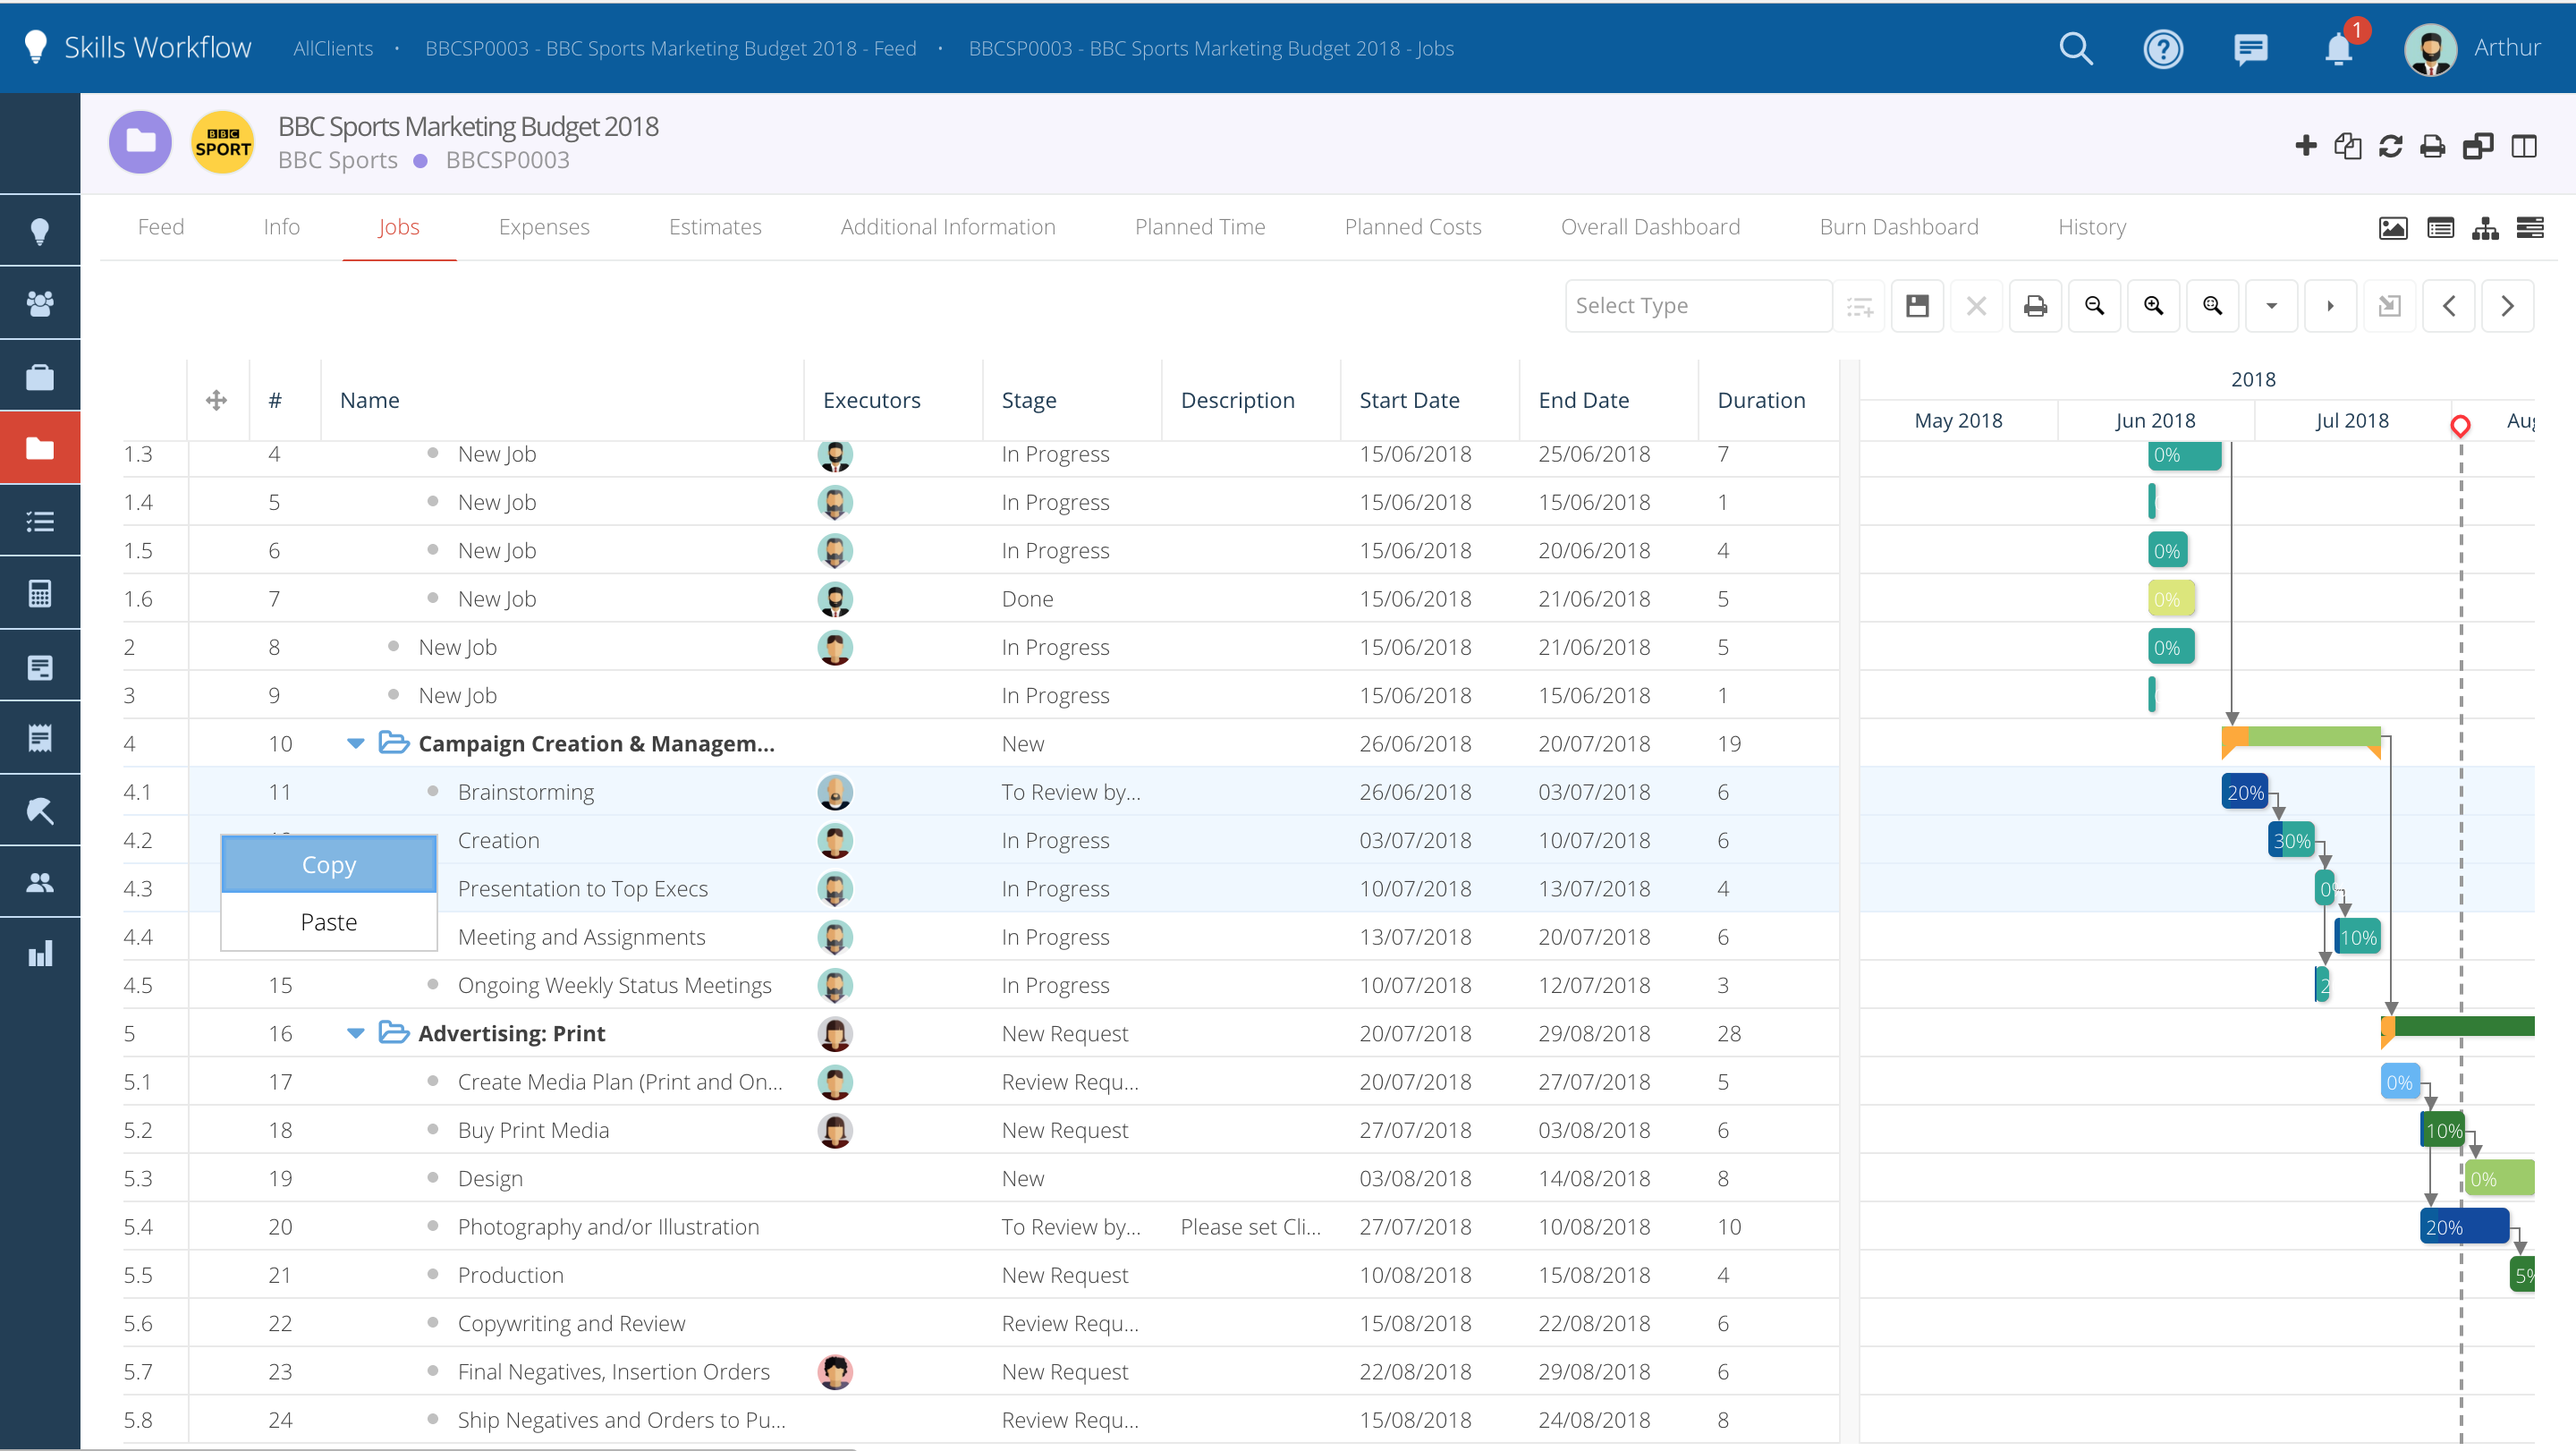
Jobs can now be easily copied and pasted in order to quickly create Schedules.
-
Select the jobs you want to copy, click on the right side of the mouse and select the option Copy.
-
After this, paste the jobs by selecting the option "Paste".
-
You can also copy Jobs and paste them in other Projects.
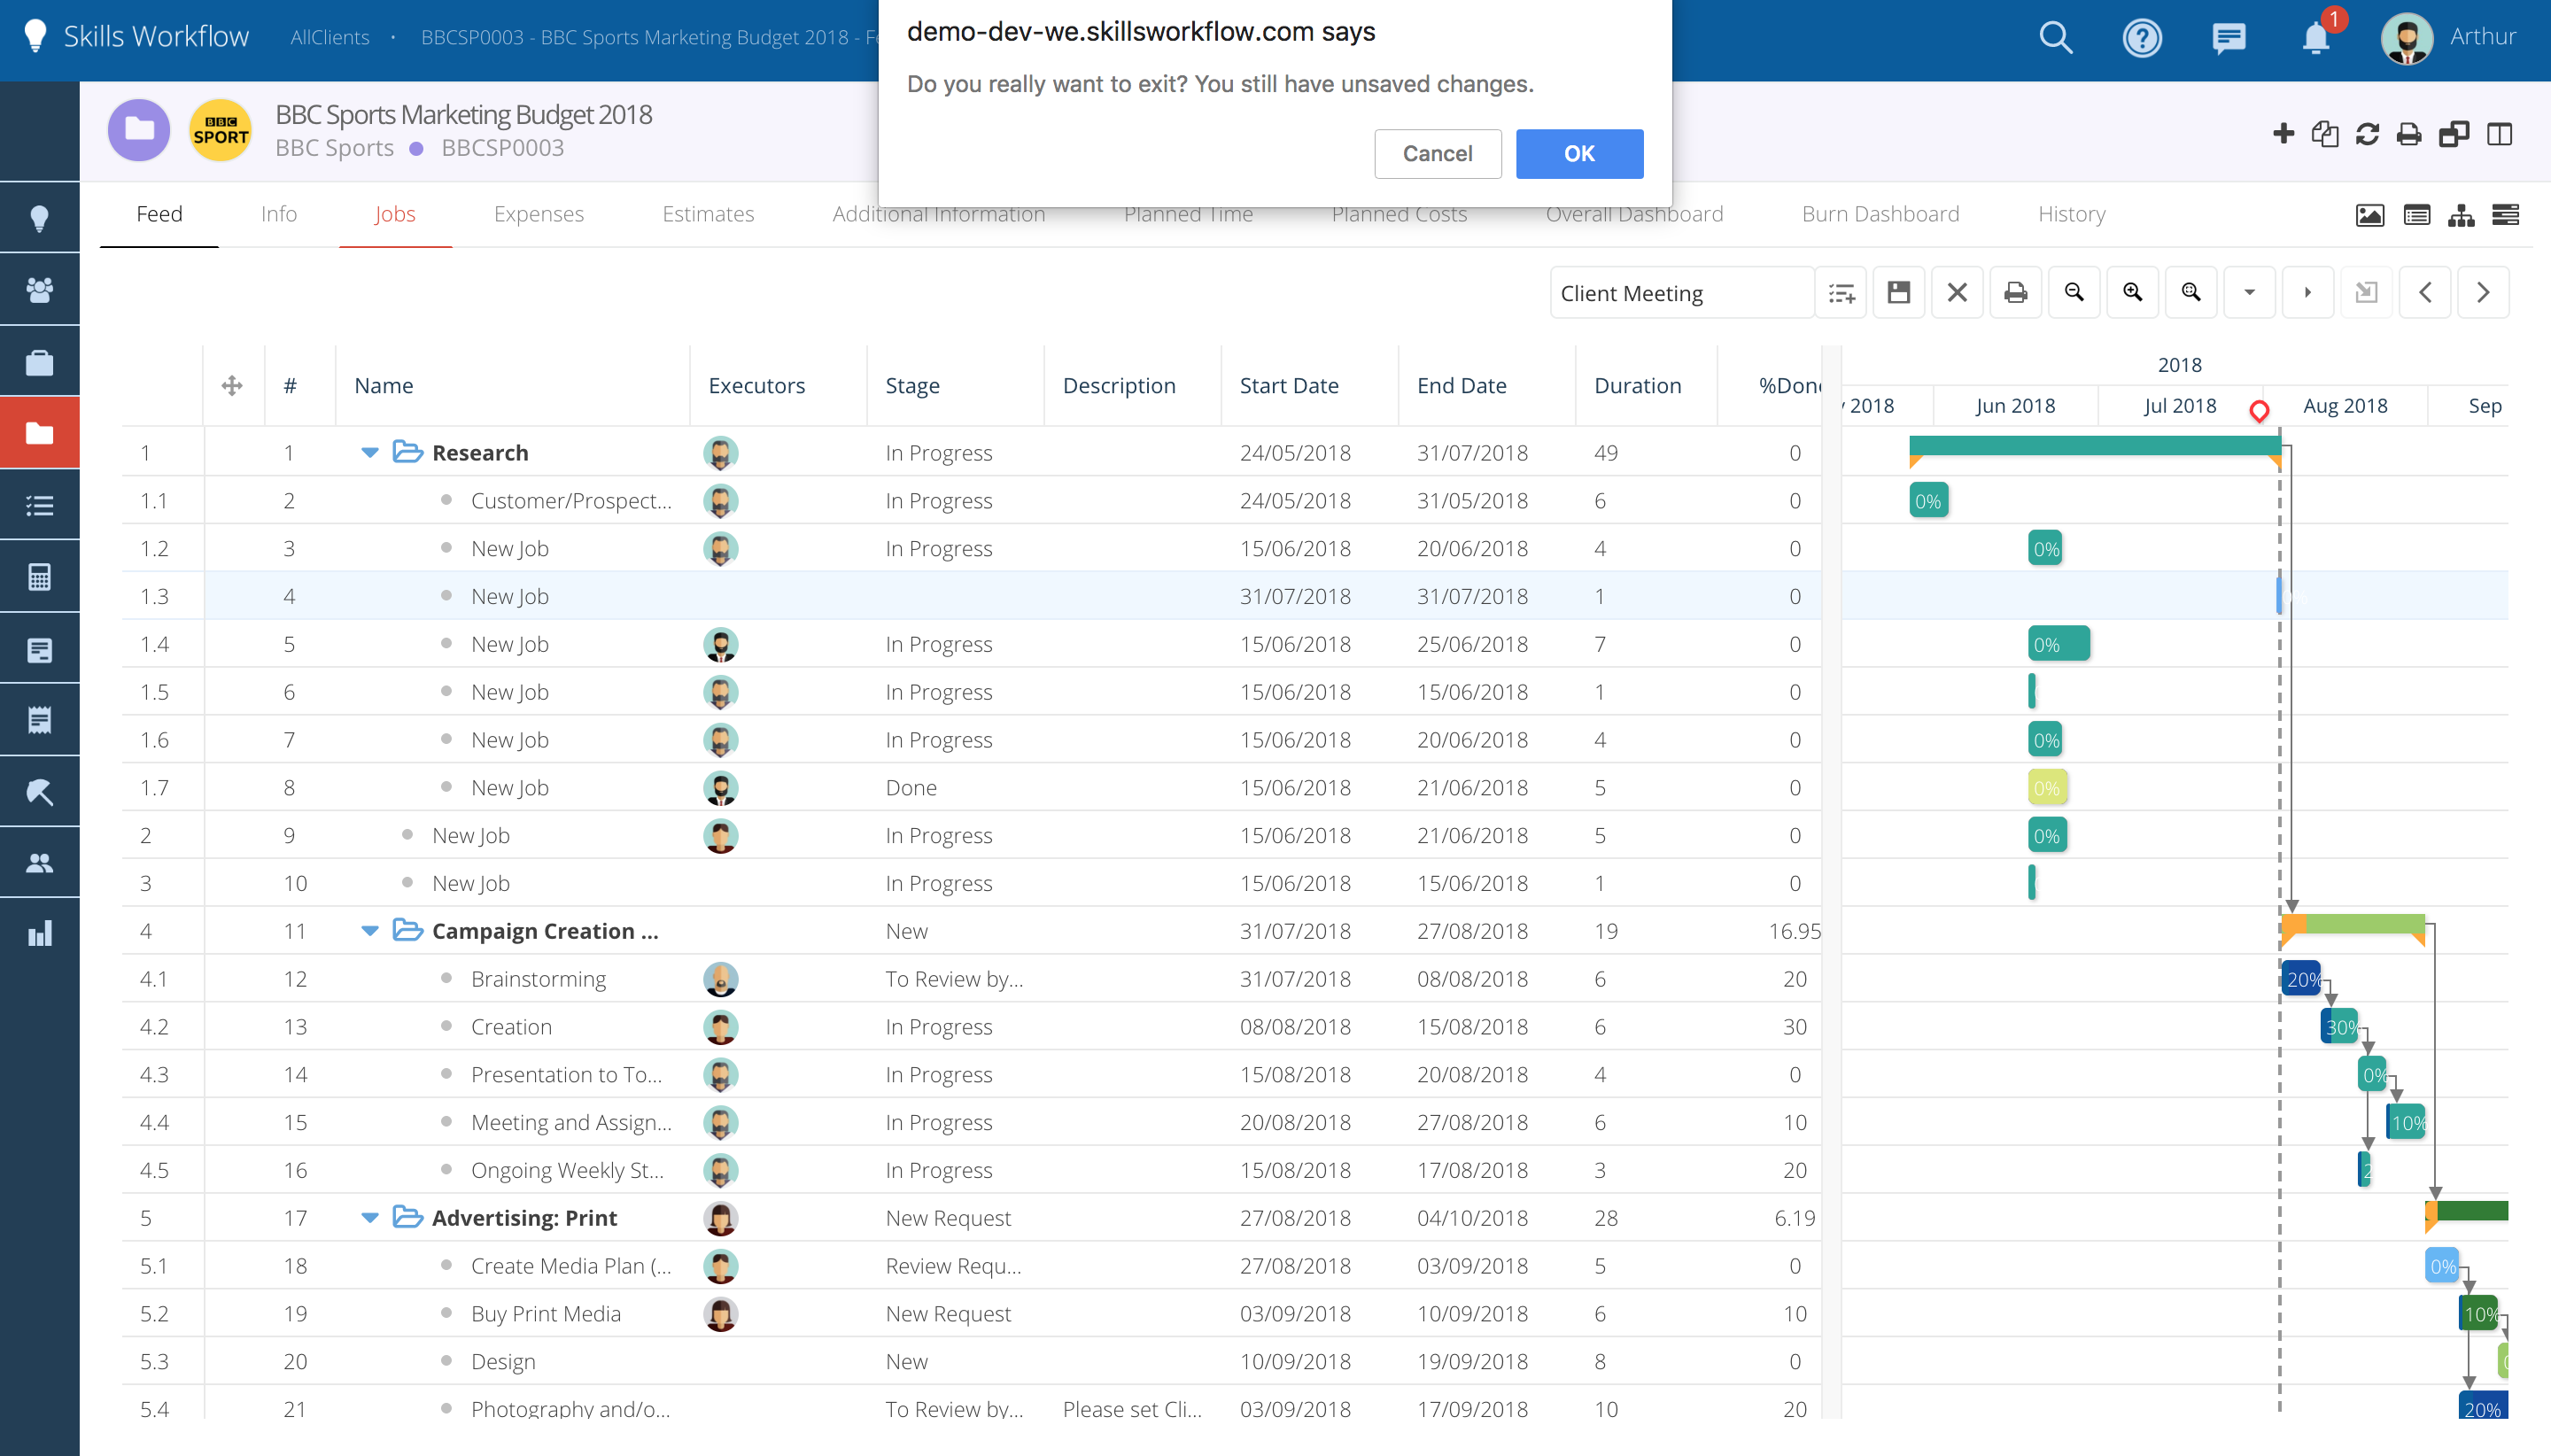
Pop-up message when leaving the project.
Whenever you try to navigate to another module/tab without saving the changes you made, a pop-up message will appear alerting that there are unsaved changes.